UPDATE – 21/12/2007 – I got a lot of hits from people wanting to get DVD’s onto their SONY NWZA818 or other A80x Walkman so I wrote a quick guide for you guys here – How to get DVD onto SONY NWZA818 / SONY A80* Walkman
.
Ok so you got your fancy new iPod Touch, nano, iPhone or iWhatever and it looks great apart from one thing…how do you make and watch your own videos on the thing?? Fret no further as we guide you through this step by step and show you how to convert and encode your DVD’s, .mov, .wmv, mpegs, DivX and whatever else you may need to encode onto your iPod / iPhone.
Before we get started I know that most of you wil be wondering why not just use the facilities offered by iTunes? The menu image can be accessed by going to Advanced > Convert selection for iPod. The short answer is because it’s a bit average and, as we all know, average is the most offensive word in the English language. iTunes simply converts and encodes any video file you select into what it thinks is the most appropriate format but not neccessarily be the best format. For example, when converting mpegs with multiplexed audio files the end product will have no sound. The whole process of converting video files also takes rather longer using iTunes than if you used a third party sowftware application. You can also forget about encoding any videos you downloaded from the iTunes store due to DRM protection or any videos that iTunes already thinks is in the appropriate format but you may want to tweak and improve.
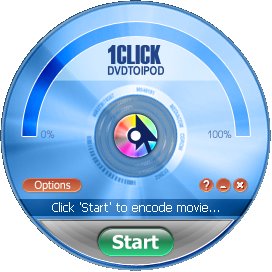
If you need to convert your DVD’s into an iPod ready format one of the best options is 1Click DVD to iPod Converter
. This isn’t freeware and comes in at around $39 but as far as ease of use goes it’s on the the best.
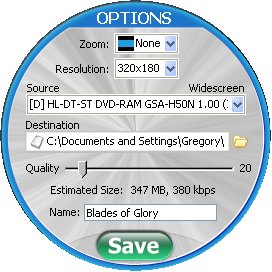
Simply insert the DVD and click the start button. The software also automatically knows when you have a DVD with many episodes and converts them into seperate iPod video files. The default settings converts movies with optimal quality (max 20) and a relatively small size. Right clicking anywhere on the application will bring up more options such as resolution and video size but if you want something quick and easy
for your DVD’s then this isn’t far off the mark. You can even remove the black bars from wide screen DVD’s by adjusting the zoom options (handy if you are converting to watch on an iPod nano or iPod Classic).
For converting mpegs, wmv’s and all other video media that you may download off the web there are several options, Roxio Crunch being amongst them. Crunch was originally a Mac application but has been ported over to windows. Its key feature is the ability to batch convert many files realtively quickly. Nice as that may sound it also costs $50 and when all is said and done, it is really just a subset of Roxio’s Popcorn application but streamlined to be more user friendly.
We don’t really want you to spend that money so we are going to focus on a freeware application and one of the best is HandBrake which is another orignal Mac application which thankfully has now got a Windows version.
Make sure you have the latest version of Apple Quicktime, download Handbrake for free from here
and let’s begin.
When you install the program you may get a prompt telling you that you do not have the correct version of .Net framework installed, If so, just download and install from here
. If you have Windows Vista on the machine you have installed HandBrake on then you should make sure that you run Handbrake as an administrator otherwise the DVD scanning process will NOT work. Simply go to the Program Files folder (usually on your C: drive) find the Handbrake exe (should be in the’Handbrake’ folder funnily enough) and right click the Handbrake.exe and click the option ‘Run as administrator’.
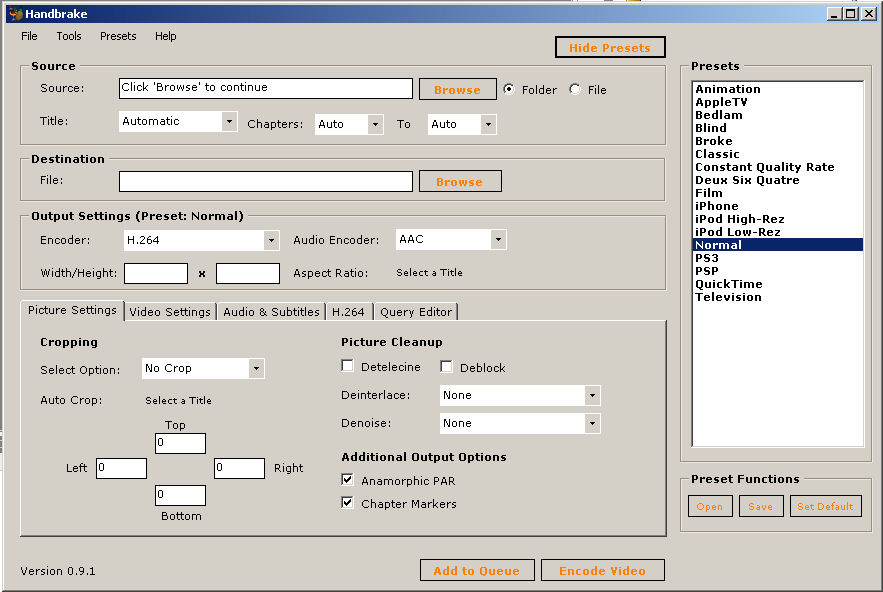
Once you have actually got it installed and start it up the Screen you will be presented with is as below (click to enlarge):
There are a lot of bells and whistles here for the more advanced user who wants his image and sound just so but if you’re a novice don’t worry about all the options as were going to go through the streamlined usage.
-
Go to the Source section at the top and select what kind of source you will be browsing to, ‘Folders’ (DVD’s) or ‘Files’ (ISO / TS / Mpeg etc). The default is DVD so you can leave it on the ‘Folder’ option. Either way after clicking the [Browse] button you will see a file open dialogue.
-
With the ‘Files’ option you just need to browse to where you have saved your image, mpeg or whatever and select it. Using the ‘Folders’ option you will see the typical folders selection window that you find in any application. You need to look for the name of your DVD with the drive letter above it. Click on the ‘+’ and the ‘VIDEO_TS’ folder will appear. Select this and press OK.
-
Click OK to the prompt that appears and you will see a DOS window pop up for about 20 seconds (could be quicker or longer depending on your PC and the DVD being scanned). This will dissapear after it’s done.
-
Go to the Title section on the Handbrake GUI and select the DVD title you want to encode (the one you want is usually the one with longest duration). Leave the DVD chapters on auto for now to encode everything. If you want to pick and choose which chapters to encode simply select the range from the Chapters section on the GUI.
-
Go to the Destination section and click [Browse] to choose the location of where you want th finished file saved to, type your file name and click ‘Save’.
-
On the right hand side of the Handbrake GUI there are the preset options. Choose the one you want, either iPod versions or iPhone in this case and click the [Encode Video] button at the bottom of the GUI.
That’s it! You’re done! Make sure you share this article with anyone who needs to know and if you have any feedback you can reach me at saif270@gadgetheat.com
You can also visit the Handbrake forums and read their own userguide here
. If you have an iPod, iPhone or iWhatever you can also check out our sister site www.hdtvreviews.org.uk
for HD TV Reviews


